Complete Lawn Renovation Guide: How to Fix a Bad Lawn
You’ve stared at the patchy, weed-choked mess in your yard long enough. Maybe it’s been a slow decline over a few seasons, or maybe you bought a house with a lawn that was already a disaster. Either way, you’ve reached the point where you know something has to change — but where do you actually start?
This complete lawn renovation guide walks you through everything: how to honestly assess what you’re working with, when a full renovation is necessary versus a simpler overseeding approach, and the exact step-by-step process to go from bare dirt to a lush, healthy stand of grass. Whether you’re dealing with 90% weeds or a lawn that’s just 30% off, there’s a path forward — and this guide covers all of them.
Step 1: Honestly Assess Your Lawn
Before you spend a single dollar or hour of effort, you need to know what percentage of your lawn is actually salvageable. Walk your yard on a dry day and categorize what you see:
- Desirable grass — healthy turfgrass of the variety you want
- Weeds — broadleaf weeds, grassy weeds (crabgrass, nutsedge), or invasive species
- Bare soil — areas with no vegetative cover at all
- Thatch or dead material — brown, matted grass that may or may not recover
The 50% Rule: If more than 50% of your lawn is covered by weeds, bare spots, or undesirable grass, a full renovation almost always makes more economic and practical sense than trying to work around the existing growth. Spot-treating and overseeding into a heavily weedy lawn rarely produces lasting results — the weeds win.
If your lawn is 40–60% good grass, you may be a candidate for partial renovation through aggressive overseeding and weed control, which we’ll cover below.
If your lawn is less than 40% good grass, plan on starting over entirely.
What Counts as “Good Grass”?
Be honest here. A lawn full of coarse, clumping tall fescue invading a Kentucky bluegrass lawn isn’t “good grass” — it’s a different species that will always look out of place. Similarly, Bermuda grass creeping into a cool-season lawn is essentially a weed. Count only the grass type you actually want.
Renovation Options Overview
Full Renovation (Starting Over)
A full renovation kills all existing vegetation, prepares the soil, and establishes entirely new turf. This is the right choice when:
- Weeds or bare soil exceed 50% of total lawn area
- You want to change grass species (e.g., switching from tall fescue to zoysia)
- Soil grading or drainage issues need to be corrected
- Persistent pest or disease problems have damaged the root zone
Partial Renovation (Overseeding Approach)
When 40–60% of your lawn is good grass, you can often improve it significantly by:
- Killing weeds selectively with broadleaf herbicides
- Dethatching or core aerating to open the soil
- Overseeding with a matching grass variety
- Fertilizing to push existing good grass to fill in
This approach takes more time (expect 2–3 seasons to see full results) but costs less and preserves your existing good turf.
Full Renovation: Step-by-Step
Step 1: Choose Your Timing
Timing is the single most important variable in lawn renovation success. Plant grass when conditions favor the seed, not when it’s convenient for you.
Cool-season grasses (Kentucky bluegrass, tall fescue, fine fescue, perennial ryegrass):
- Best time: Late summer to early fall (mid-August through September in most of the U.S.)
- Soil temperatures are still warm enough for germination, but air temperatures are cooling — ideal for seedling establishment
- Second-best: Early spring (March–April), though weed pressure is higher
Warm-season grasses (Bermuda, zoysia, St. Augustine, centipede, buffalo grass):
- Best time: Late spring to early summer (May–June) after soil temperatures reach 65–70°F consistently
- Avoid seeding or sodding in fall — warm-season grass goes dormant and establishment fails
Step 2: Kill Existing Vegetation
You need a clean slate. There are two main approaches:
Non-Selective Herbicide (Most Effective)
A glyphosate-based herbicide like Roundup Weed & Grass Killer is the most reliable way to kill everything in your lawn — grass, weeds, and all. Apply it on a calm, dry day when temperatures are above 60°F.
- Apply to actively growing vegetation
- Wait 7–14 days for complete kill-down (plant material will turn brown)
- For heavy weed pressure or established perennial weeds, a second application 2 weeks after the first greatly improves results
- Glyphosate breaks down in soil within days to weeks — it does not persist and won’t harm your new seed
Organic Option: Solarization
If you prefer to avoid herbicides, solarization uses heat to kill existing vegetation:
- Mow the lawn as short as possible
- Water the area thoroughly
- Cover with clear plastic sheeting (4–6 mil greenhouse plastic works well)
- Secure edges with soil or boards
- Leave in place for 4–8 weeks in full sun (best done in summer)
Solarization is effective but takes longer and requires good summer sun. It also kills weed seeds in the top few inches of soil, which is a significant benefit.
Step 3: Soil Testing
Never skip soil testing. A $15–$30 soil test from your local cooperative extension office tells you the pH of your soil and its levels of phosphorus, potassium, calcium, and magnesium. Most lawn grasses want a soil pH of 6.0–7.0. Renovation is the perfect time to correct any deficiencies because you’re already disturbing the soil.
- Low pH (acidic): Apply ground limestone at the rate specified by your test
- High pH (alkaline): Apply sulfur to lower pH
- Low phosphorus: A starter fertilizer high in phosphorus at seeding time helps establish new grass
Step 4: Grading and Leveling
Before adding any amendments or seed, fix any grading issues. Water should drain away from your home’s foundation at a minimum 2% slope (about 2 inches of drop per 10 feet of run).
- Fill low spots with clean topsoil
- Remove or redistribute high spots
- Use a landscape rake to achieve a smooth, even surface
For large areas, renting a rototiller makes deep tillage far more practical. Tilling to 4–6 inches breaks up compacted soil and creates an excellent seedbed.
Step 5: Soil Amendment
Once graded, incorporate amendments based on your soil test results:
- Compost: Apply 2–3 inches of quality compost and till it in. This is the single best thing you can do for most soils.
- Lime or sulfur: Incorporate pH-adjusting amendments at this stage
- Sand (only for very heavy clay soils): Only add sand if you’re adding enough to change soil texture (50%+ by volume) — adding small amounts of sand to clay creates a cement-like mix
After tilling and amending, use a lawn roller filled halfway with water to firm the seedbed. This reveals any remaining low spots and ensures good seed-to-soil contact.
Step 6: Seeding vs. Sodding
Seeding — Pros and Cons
- Cost: Significantly cheaper — expect $100–$400 in seed for a typical yard vs. $1,000–$5,000+ for sod
- Selection: Far more grass varieties available as seed than sod
- Establishment time: 4–8 weeks to germination, 6–12 months for a mature lawn
- Risk: Weather-dependent; vulnerable to washout, drying out, and birds
For seeding, choose a high-quality grass seed blend appropriate for your region and conditions. Apply with a broadcast or drop spreader at the rate specified on the bag. Lightly rake seed into the top 1/4 inch of soil, then roll to firm.
Sodding — Pros and Cons
- Instant results: Functional lawn in 2–3 weeks
- Less weed pressure: Dense sod knits together before many weeds can establish
- Cost: Substantially more expensive
- Limited selection: Fewer grass varieties available; sod farms grow what sells in volume
For sodding, prepare the soil identically to seeding. Lay sod in a brick-like staggered pattern, butt pieces tightly together, and roll the finished area. Water deeply immediately after installation.
Step 7: Irrigation Setup
New seed must never dry out during germination — the top 1/4 inch of soil should stay consistently moist. This typically means watering lightly 2–3 times per day in dry weather until germination, then transitioning to deeper, less frequent watering as seedlings establish.
A temporary sprinkler setup works, but a permanent in-ground irrigation system installed during renovation (before seeding) will pay dividends for years. If you’re considering irrigation, renovation is the best time to install it.
Step 8: Starter Fertilizer
Apply a starter fertilizer at seeding or sodding time. Starter fertilizers are high in phosphorus (the middle number in the N-P-K ratio) to support root development. A product like Scotts Starter Food for New Grass is widely available and effective. Follow label rates closely — more is not better with fertilizer.
Step 9: Post-Establishment Care
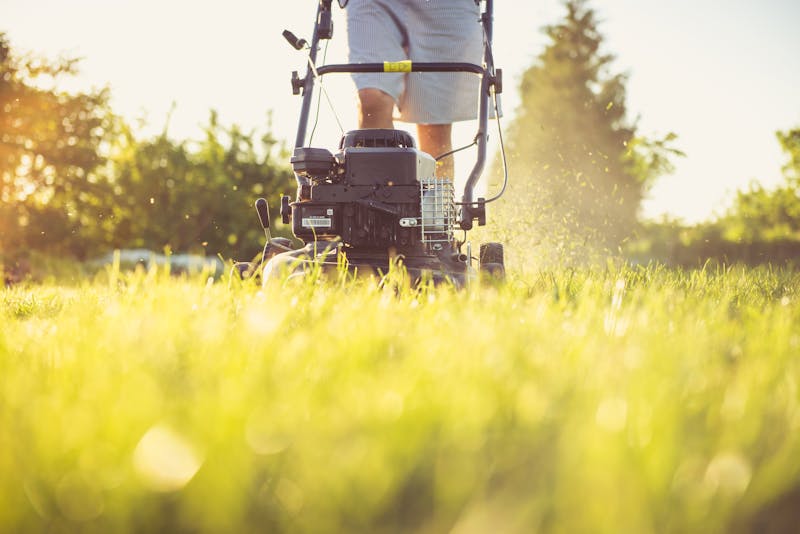
- First mow: Mow new grass when it reaches 1.5x its target height. Use a sharp blade and never remove more than 1/3 of the blade at a time.
- Traffic: Stay off new seeded areas until grass is well established (6–8 weeks)
- Weed control: Wait until you’ve mowed new grass 3–4 times before applying any herbicides
- Fertilizing: Apply a maintenance fertilizer 6–8 weeks after establishment
Partial Renovation: The Overseeding Approach
When 40–60% of your lawn is desirable grass, a full kill-down may not be necessary. Here’s how to improve a lawn without starting from scratch:
- Test your soil and correct pH and nutrient deficiencies
- Treat broadleaf weeds with a selective broadleaf herbicide (2,4-D or a three-way product). Wait the label’s required interval before seeding.
- Core aerate the entire lawn to relieve compaction and create seed-to-soil contact opportunities
- Dethatch if thatch layer exceeds 1/2 inch
- Overseed at 50–75% of the standard new-seeding rate using the same grass variety as your existing lawn
- Apply starter fertilizer immediately after seeding
- Water consistently to keep the seedbed moist during germination
Expect this approach to take 2–3 full growing seasons to achieve a dense, uniform lawn. Repeat overseeding each appropriate season.
Special Situations
Shaded Lawn Renovation
Shade renovations require shade-tolerant varieties and realistic expectations. For cool-season lawns:
- Fine fescues (creeping red, chewings, hard, sheep) are the most shade-tolerant cool-season grasses
- Aim for a minimum of 3–4 hours of direct sun, or filtered light throughout the day
- Tree root competition reduces water and nutrients available to grass — consider raising the soil level slightly or using ground covers instead
Slope Stabilization
Slopes steeper than 3:1 (3 feet of run for every 1 foot of rise) are difficult to establish with seed due to erosion:
- Use erosion control blankets (biodegradable jute or coir netting) to hold seed in place
- Consider sodding steep slopes for faster establishment and erosion control
- Hydroseed is an excellent option for slopes — the mulch slurry holds seed and moisture effectively
- Slope-tolerant ground covers (creeping juniper, liriope, crown vetch) may be more practical on very steep grades
Common Lawn Renovation Mistakes to Avoid
- Seeding at the wrong time of year — this is the most common and most costly mistake
- Skipping soil testing — you can’t fix what you don’t measure
- Underestimating weed pressure — one application of herbicide is often not enough
- Poor irrigation — new seed that dries out even once during germination is lost
- Mowing too soon — wait until seedlings are at least 3 inches tall for the first mow
- Heavy foot traffic — keep kids, pets, and lawn equipment off new seedings
Conclusion
A successful lawn renovation requires honest assessment, good timing, and disciplined follow-through. The process isn’t complicated, but it does demand attention to detail — particularly around soil preparation, seed-to-soil contact, and consistent irrigation during establishment.
The key takeaway: If your lawn is more than 50% weeds or bare soil, commit to a full renovation rather than trying to patch it. Done right, a lawn renovation is a one-time investment that can deliver 10–20 years of dense, healthy turf. Done halfway, you’ll be back in the same situation in two seasons.
Take your time with soil preparation, choose the right grass for your region, and water religiously for the first 6 weeks. Your future self will thank you every time you look out at the yard.

TurfTech HQ Editorial Team
Independent trade-focused editorial team