Drip Irrigation for Landscaping: Complete Installation Guide
Overhead sprinklers are efficient for turf, but they’re the wrong tool for planting beds, shrubs, trees, and vegetable gardens. Water sprayed overhead wets foliage (inviting fungal disease), evaporates before it reaches the root zone, and lands everywhere except where plants actually need it — the soil around the roots.
Drip irrigation delivers water directly to the root zone of individual plants, one slow drip at a time. It’s the most water-efficient irrigation method available, and it’s far easier to install than most homeowners expect.
This guide covers everything from system design and component selection to step-by-step installation and long-term maintenance.
Why Drip Irrigation Beats Overhead Spray for Landscaping
Before getting into the how, it’s worth understanding the why.
Water Efficiency
Properly designed drip systems are 30–50% more efficient than overhead spray irrigation. Water goes directly to the root zone, there’s minimal evaporation, and there’s no overspray onto hardscape or weeds in bare soil areas.
Disease Prevention
Wet foliage is the #1 cause of fungal disease in landscape plants — powdery mildew, black spot, leaf blight, and more. Since drip irrigation never wets leaves, it dramatically reduces disease pressure on roses, tomatoes, fruit trees, and other susceptible plants.
Root-Zone Delivery
Plants absorb water through their roots, not their leaves. Drip delivers water at low pressure and low flow rates, giving it time to percolate deep into the soil rather than running off the surface. This encourages deep root development, making plants more drought-tolerant over time.
Weed Suppression
Because only the immediate root zone of your plants is wetted, bare soil between plants stays dry. Dry soil means far fewer weed seeds germinating. Combine drip with landscape fabric or a layer of mulch and you’ll spend a fraction of the time weeding.
Drip Irrigation Components Explained
A drip system has more components than an overhead system, but each one serves a specific purpose. Understanding them makes both installation and troubleshooting much easier.
Main Line Tubing (Header Tubing)
The ½-inch polyethylene main line (also called header or supply tubing) carries water from your water source to the planting areas. It connects to your timer, valve, and pressure regulator at one end and runs along the length of your bed.
Standard main line is typically black, UV-resistant poly tubing. Rain Bird, Netafim, and DIG all make quality main line available at home improvement stores and irrigation supply houses.
Emitter Tubing (Distribution Tubing)
¼-inch micro-tubing (also called spaghetti tubing or distribution tubing) branches off the main line to deliver water to individual emitters positioned at each plant. It connects to the main line via barbed tee fittings punched through the wall of the ½-inch tubing.
Inline drip tubing is an alternative to individual emitters — it has emitters pre-installed at regular intervals (6, 12, or 18 inches) and lays directly over the root zone of densely planted areas like vegetable gardens.
Emitters
Emitters control exactly how much water each plant receives. They come in several configurations:
- Button emitters (point-source): Screw or push into the end of ¼-inch tubing; available in 0.5, 1, 2, and 4 GPH (gallons per hour)
- Inline emitters: Built into ¼-inch tubing at set intervals
- Flag emitters: Stake into the soil right at the root zone; easy to relocate
- Adjustable emitters: Turn a dial to set flow from 0 to 10+ GPH — useful when exact flow rates aren’t yet known
A basic guideline: 1 GPH per gallon of pot size for container plants; 1–2 GPH per shrub of 1–3 gallons size; 2–4 GPH per large shrub or small tree.
Pressure Regulator
This is non-negotiable. Drip systems operate at 15–30 PSI — far lower than typical household pressure (40–80 PSI). Without a pressure regulator, emitters will spit, mist, or blow off entirely, and tubing connections will leak.
Install a 25 PSI pressure regulator (available for $8–$20) at the start of each drip zone or at the hose bib connection. Most drip kits include one, but standalone regulators from Rain Bird or Orbit are easy to find.
Filter
Drip emitters have very small orifices and clog easily with sediment, algae, or hard water deposits. A Y-strainer filter or inline filter installed upstream of the pressure regulator catches particles before they reach your emitters.
Most drip kits include a 150- or 200-mesh filter. Clean it annually by unscrewing the filter housing and rinsing the screen.
Timer or Controller
A hose bib timer is the simplest way to automate a drip system — it screws directly onto your outdoor faucet and runs on batteries or solar power. The Orbit 62061 and Rain Bird SST600I are popular, reliable options.
For a permanent installation, connect your drip zone to a standard 24V solenoid valve controlled by your irrigation controller. This lets you manage drip zones alongside your sprinkler zones on a unified schedule.
End Caps and Figure-8 End Closures
The end of every main line run needs to be sealed. Figure-8 end closures fold the tubing over on itself and clip shut — easy to open for periodic flushing. End caps are a more permanent option. Always use one of these instead of just kinking and tying the tubing.
Designing Your Drip System
Step 1: Map Your Planting Areas
Sketch a layout of your beds, noting the location and size of each plant. Group plants with similar water needs on the same zone:
- High water (vegetables, annuals, shallow-rooted perennials)
- Medium water (most shrubs, established perennials)
- Low water (drought-tolerant natives, succulents, established trees)
Mixing high-water and low-water plants on the same zone means you’ll either underwater one group or overwater the other.
Step 2: Calculate Your Flow Rate
Add up the GPH of all emitters on a planned zone. Most residential hose bibs flow 200–600 GPH — keep each zone well below that maximum.
Example: 20 plants at 1 GPH each = 20 GPH per zone. That’s well within range. But 60 plants at 2 GPH each = 120 GPH — still manageable if your supply pressure supports it.
A general rule: keep each zone under 200 GPH total for reliable performance.
Step 3: Plan Main Line Routing
Route your main line along the edge of the bed or down the middle — wherever allows the shortest ¼-inch runs to individual plants. Keep ¼-inch micro-tubing runs under 18 inches when possible; longer runs lose pressure and reduce emitter accuracy.
For large beds, run two parallel main lines down each side with plants served from both.
Step-by-Step Installation
What You’ll Need
- ½-inch polyethylene main line tubing
- ¼-inch micro-tubing
- Emitters (appropriate GPH for each plant)
- Barbed tee fittings and hole punch tool
- Pressure regulator (25 PSI)
- Y-strainer filter
- Timer (battery or 24V solenoid)
- Tubing stakes (to hold tubing in place)
- End caps or figure-8 closures
- Teflon tape
Installation Steps
1. Install the filter and pressure regulator Connect the filter to your hose bib or valve outlet first, then the pressure regulator. Thread connections should be hand-tight plus a quarter turn — use Teflon tape on all threaded fittings.
2. Connect and route the main line Attach the ½-inch main line to the outlet of the pressure regulator. Run the tubing along your planned route, using tubing stakes every 2–3 feet to hold it in place. Leave 12 inches of extra tubing at the far end for flushing.
3. Punch holes and insert tee fittings Use a punch tool (often called a Goof Plug punch or emitter punch) to make a hole in the main line wherever you need a ¼-inch branch. Push in a barbed tee fitting until it seats fully — it should be snug and not pull out with moderate force.
4. Run micro-tubing to each plant Cut ¼-inch tubing to length and connect to each tee fitting. Run the tubing to the plant’s root zone (6–12 inches from the base of small plants, further for large shrubs and trees).
5. Install emitters Push the appropriate emitter into the end of the ¼-inch tubing. For flag emitters, push the stake into the soil at the drip zone. For point-source button emitters, position the tubing end and use a stake to hold it in place.
6. Cap the end of the main line Fold the last 6 inches of main line and secure with a figure-8 end closure.
7. Flush the system before final installation Before installing emitters, turn on the water and let it run through the open main line for 60 seconds to clear any debris. Then install emitters.
8. Set your timer Program your timer or controller. Drip runs much longer than spray — plan for 30–90 minutes per zone depending on emitter flow rates and plant needs. Water needs to penetrate 6–12 inches deep to reach the majority of root zones.
9. Mulch over the tubing Apply 2–3 inches of mulch over all tubing and emitters. Mulch protects the tubing from UV degradation, keeps soil moisture more consistent, and further reduces evaporation.
Emitter Placement by Plant Type
Trees (Established)
Place 2–4 emitters per tree equidistant around the drip line (the outer edge of the canopy), not directly at the trunk. Tree roots extend far beyond the canopy — the goal is to wet a large area, not just the root ball.
- Small trees (under 15 ft): 2–3 GPH emitters, 2 per tree
- Medium trees (15–30 ft): 2 GPH emitters, 4–6 per tree, spaced around drip line
Shrubs
Place 1–2 emitters per shrub on opposite sides of the plant, 6–12 inches from the crown:
- Small shrubs (1-gal size): 1 GPH × 1 emitter
- Medium shrubs (5-gal size): 1–2 GPH × 2 emitters
- Large shrubs (15-gal size): 2 GPH × 3–4 emitters
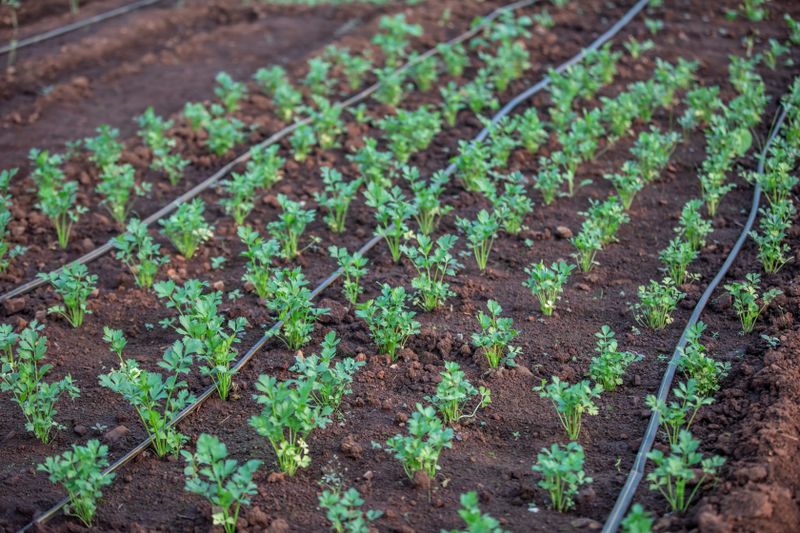
Vegetable Gardens and Annual Beds
Use inline drip tubing with emitters spaced every 6 or 12 inches, run in parallel rows spaced 12–18 inches apart. This delivers even coverage across dense plantings more efficiently than individual emitters for each plant.
Container Plants
One emitter per container, positioned to drip into the center of the pot. Flow rate depends on container size:
- Under 6 inches: 0.5 GPH
- 6–12 inches: 1 GPH
- 12–24 inches: 2 GPH
Use self-cleaning emitters (like Netafim’s Woodpecker series) for containers, as they’re less prone to clogging with the more concentrated minerals in container soil.
Maintenance
Monthly (During Season)
- Walk your system and visually check each emitter while running
- Look for: emitters knocked out of the soil, wet spots indicating a break, dry spots indicating a clogged emitter
- Replace any clogged or broken emitters immediately — they’re inexpensive
Seasonally (End of Summer/Early Fall)
- Flush the main line: Open the figure-8 end closures and run the system for 2–3 minutes to flush accumulated sediment and mineral deposits
- Clean the filter: Unscrew the Y-strainer and rinse the mesh screen under running water
- Check pressure: If you notice emitters weeping or misting, your pressure regulator may need replacement (about every 3–5 years)
Winterization
If you live in a freezing climate:
- Turn off the water supply
- Open end closures to drain main line
- Blow low-pressure air through the lines to remove remaining water
- Disconnect and store any above-ground components (hose bib timers, filters, regulators) indoors
- Buried main line in well-drained soil can usually remain in place
Converting From Spray Irrigation to Drip
If you already have an in-ground sprinkler system, converting planting bed zones to drip is one of the best upgrades you can make.
What you’ll need:
- Conversion kit (header tubing, pressure regulator, filter)
- Drip conversion cap or MP Rotator cap replacement for existing pop-up heads (this caps the spray head riser and allows you to attach ¼-inch tubing directly)
Steps:
- Turn off water to the zone
- Remove existing spray nozzles
- Install a drip conversion cap on each head riser, or replace the entire head with a drip zone flag
- Connect ½-inch distribution tubing to the conversion point
- Run tubing and emitters to each plant as described above
- Install pressure regulator at the zone valve if head pressure exceeds 30 PSI
The converted zone will now deliver water at drip rates instead of spray. Adjust your controller run time to 30–90 minutes (versus 5–10 for spray heads) to ensure adequate delivery.
Conclusion
Drip irrigation is the smartest investment you can make for planted beds and landscaping. It saves water, dramatically reduces fungal disease, suppresses weeds, and once installed, runs on autopilot with minimal maintenance.
Key takeaways:
- Always install a pressure regulator — drip systems run at 15–30 PSI
- Group plants by water need, not proximity
- Keep ¼-inch micro-tubing runs under 18 inches
- Flush the system seasonally and inspect emitters monthly
- Mulch over all tubing to extend UV life and reduce evaporation
With a quality drip irrigation kit from Rain Bird, Netafim, or DIG and an afternoon of installation work, you’ll have a system that quietly keeps your landscape healthier and more beautiful with far less effort and water than any hose or spray system can deliver.

TurfTech HQ Editorial Team
Independent trade-focused editorial team