How to Build a Retaining Wall: Step-by-Step Guide
A slope in your yard can be beautiful — or it can be a maintenance nightmare that erodes every time it rains and makes half your property unusable. A well-built retaining wall solves both problems. It stops erosion, creates level planting beds and usable lawn areas, and adds significant visual structure to your landscape.
The key word is well-built. Retaining walls that fail — and thousands of DIY walls fail every year — almost always fail because of poor drainage behind the wall, an inadequate base, or a wall built without enough setback (lean-back). Get those three things right and your wall will stand for decades.
This guide covers everything from wall type selection to step-by-step block installation for walls up to 4 feet tall.
When Do You Need a Retaining Wall?
Retaining walls serve three primary purposes in residential landscaping:
1. Slope stabilization and erosion control Sloped ground erodes. Rain washes topsoil downhill, bare slopes crack and slump, and plantings fail to establish in unstable soil. A retaining wall creates a stable, level face that holds soil in place permanently.
2. Creating level usable space Terracing a steep yard with two or three retaining walls creates flat areas for lawn, patios, gardens, or play areas that would otherwise be unusable slope.
3. Raised bed construction Even on flat ground, low retaining walls (12–24 inches) are used to build raised garden beds, define planting areas, or create elevated planting features.
Do you need a permit? Most jurisdictions require a building permit for retaining walls over 3 to 4 feet tall (measured from the base of the footing). Some require permits for any wall that retains water or is near a property line. Always check with your local building department before starting.
Retaining Wall Types: Pros, Cons, and Costs
Segmental Concrete Block (Most Common DIY Option)
Segmental retaining wall (SRW) blocks — sold under brand names like Versa-Lok, Allan Block, Pavestone, and generic big-box store versions — are the most popular DIY retaining wall material for good reason.
- Pros: No mortar needed, designed to interlock with built-in setback, widely available, predictable sizing makes calculations easy, extremely durable
- Cons: Heavy to handle (standard blocks weigh 30–80 lbs each), somewhat industrial appearance
- Cost: $6–$20 per block; installed cost $25–$50 per sq ft of wall face
Versa-Lok and Allan Block are the gold standards for segmental blocks — both are engineered systems with specific installation specs and excellent technical support. Generic big-box blocks work fine for walls under 3 feet but may lack the connection pins and specifications needed for taller walls.
Natural Stone (Most Attractive)
Fieldstone, granite, limestone, and sandstone walls have been built for centuries and look the most natural in a landscape.
- Pros: Beautiful, natural appearance; often locally sourced; can last indefinitely with proper installation
- Cons: Requires skill to build properly (no uniform sizing), heavier to work with, sourcing quality stone can be difficult
- Cost: $15–$30 per sq ft materials; $40–$80 per sq ft installed
Dry-laid stone walls (no mortar) are actually stronger and more flexible than mortared stone — they allow water to drain freely through the wall itself and flex with ground movement without cracking.
Timber (Most Affordable, Shortest Lifespan)
Pressure-treated 6x6 or 8x8 timber walls are the most affordable option and are easy to build with basic carpentry skills.
- Pros: Inexpensive, lightweight, easy to cut and work with
- Cons: Shortest lifespan (15–25 years even with pressure-treated lumber), can bow or warp over time, not the most attractive finish
- Cost: $5–$10 per linear foot of materials; $15–$25 per sq ft installed
Use only CA-C or UC4B rated pressure-treated lumber for ground contact and retain applications. Fasten with hot-dipped galvanized or stainless steel spikes.
Poured Concrete
Poured concrete retaining walls are extremely strong and used for taller walls, highway cuts, and commercial applications.
- Pros: Maximum strength, can be formed into any shape, long-lasting
- Cons: Requires forming, rebar, and concrete pours — typically requires a contractor; difficult to DIY
- Cost: $30–$60 per sq ft installed
Not a practical DIY option for most homeowners.
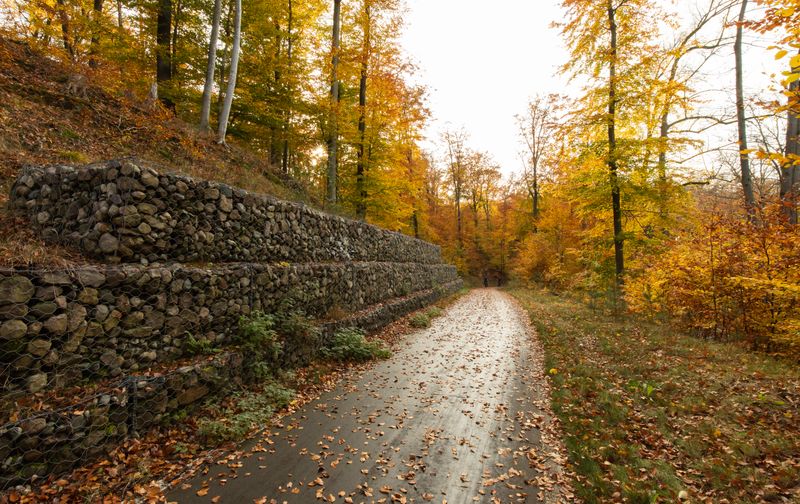
Gabion Walls
Gabion baskets — wire mesh cages filled with rocks — are increasingly popular for a contemporary, industrial aesthetic.
- Pros: Excellent drainage (water flows through freely), distinctive modern look, can use locally sourced fill material
- Cons: Wire mesh can rust over time, not universally appealing aesthetically
- Cost: $10–$15 per sq ft for wire baskets; rock fill varies
Planning Your Retaining Wall
Height Limits and Engineering Requirements
DIY-safe zone: Walls under 3–4 feet Segmental block walls up to 3–4 feet can typically be built without engineering. Most block manufacturers publish installation specs for walls in this height range.
Walls 4 feet and over require a structural engineer. A wall retaining 4+ feet of soil has enormous lateral forces acting on it. At 4 feet of retained soil, a well-built wall with geogrid reinforcement can be engineered. At 6+ feet, you need a professional engineer and a licensed contractor in most jurisdictions. This is not a rule to skip.
Drainage Requirements
Poor drainage is the #1 cause of retaining wall failure. Water that builds up behind a wall creates hydrostatic pressure that can push even a well-built wall outward.
Every retaining wall needs:
- Gravel backfill (clean crushed stone, not soil) directly behind the wall, minimum 12 inches wide
- Perforated drainage pipe at the base of the wall, draining to daylight at the end of the wall
- Weep holes if building a mortared or solid wall
Calculating Materials
For segmental block walls:
- Calculate the wall face area (length × height in feet)
- Divide by the face area of one block (listed on the product spec sheet — typically 0.5–1 sq ft per block)
- Add 15% for waste and buried first course
- Add gravel for base and backfill: roughly 1 cubic yard per 10 linear feet of wall
Example: A wall 20 feet long and 3 feet tall = 60 sq ft face area ÷ 0.67 sq ft per block = ~90 blocks. Add 15%: order 105 blocks. Plus cap blocks for the top course.
Step-by-Step Block Retaining Wall Installation
Materials and Tools
- Segmental retaining wall blocks (Versa-Lok, Allan Block, or similar)
- Cap blocks
- Compactable gravel base (crushed stone, ¾-inch minus)
- Clean drainage stone (¾-inch washed gravel) for backfill
- 4-inch perforated drainage pipe
- Landscape fabric (to separate gravel from native soil)
- Construction adhesive (for cap blocks)
- 4-foot level
- Rubber mallet
- Plate compactor (rental: ~$75/day)
- Hand tamper
- String line and stakes
- Safety glasses and gloves
Step 1: Excavate and Establish the Base Trench
Mark the wall line with spray paint or a string line. The base of the wall needs a footing trench:
- Depth: 6 inches below grade, plus 1 inch for every foot of wall height (a 3-foot wall needs a 6+3 = 9-inch deep trench)
- Width: 24 inches (to accommodate the block width plus drainage stone)
Bury the first course of blocks at least 6 inches into the ground — this anchors the wall and accounts for erosion in front of the wall over time.
Step 2: Install the Gravel Base
Add 6 inches of compactable gravel (crushed stone, ¾-inch minus) to the trench. Compact with a plate compactor. The base must be level and firm — this is where the wall’s structural integrity begins. A soft or unlevel base means an unstable wall.
Check the base for level in both directions with a 4-foot level. Tamp additional gravel into low spots.
Step 3: Lay the First Course
Set the first course of blocks into the trench on top of the compacted gravel base. This first course is the most important — take extra time to get it:
- Level front to back
- Level side to side along the entire run
- Aligned to your string line
Use the rubber mallet to seat blocks firmly. Check level after placing each block. An unlevel first course makes every subsequent course difficult to correct.
Batter (lean-back): Most segmental block systems are designed with a 1-inch setback per course — the wall leans slightly into the slope as it rises. This batter transfers some of the soil load directly through the wall to the foundation rather than pushing the wall outward. Never build a retaining wall plumb vertical — it will eventually fail.
Step 4: Install Drainage Pipe
Before backfilling, lay a 4-inch perforated pipe in a bed of drainage stone directly behind the first course. The pipe should:
- Sit on top of or just above the first course of blocks
- Run the full length of the wall
- Have an outlet at each end that drains to daylight (downslope, away from the wall)
Wrap the pipe in landscape fabric sock or wrap the entire drainage stone trench in landscape fabric to prevent fine soil particles from migrating into the gravel over time and clogging the drainage.
Step 5: Build Subsequent Courses
Set each successive course of blocks:
- Stagger the joints — block seams should not align vertically; offset each course by half a block length
- Maintain the setback built into the block design (most systems have a lip on the back of each block that automatically creates the correct batter)
- Sweep debris off each course before adding the next
- Check level frequently — every 2–3 courses
Use construction pins (provided with engineered block systems) to interlock courses per the manufacturer’s specs.
Step 6: Backfill as You Build
Don’t wait until the wall is complete to backfill — backfill in lifts as you build:
- After each 1–2 courses, add 6 inches of clean drainage stone directly behind the blocks (minimum 12 inches wide)
- Compact the drainage stone with a hand tamper (not a plate compactor near the wall — the vibration can dislodge courses)
- Behind the drainage stone, backfill with native soil or clean fill
- Compact the fill, sloping it slightly away from the wall for positive drainage
Step 7: Install Geogrid Reinforcement (Walls Over 3 Feet)
For walls taller than 3 feet, geogrid reinforcement is required by most block manufacturers and building codes. Geogrid is a plastic mesh material that extends back into the hillside and anchors the wall against lateral forces.
Typical geogrid installation:
- Install at 2-foot vertical intervals (per manufacturer specs)
- Extend geogrid back into the hillside at least 6 feet (or 60% of wall height, whichever is greater)
- Compact fill over each geogrid layer before placing the next courses
Always follow the specific geogrid specs for your block system — Versa-Lok, Allan Block, and others have published engineering tables that specify grid placement for given heights and soil conditions.
Step 8: Cap the Wall
The cap course finishes the wall and protects the top from water infiltration. Use cap blocks designed for your block system, or use flat natural stone for a more refined look.
Secure cap blocks with construction adhesive (SRW adhesive like Loctite PL 500 or similar). Apply a bead of adhesive to the top of the last structural course and set the caps firmly.
Finishing and Maintenance
Finish Grading
Once the wall is complete, grade the soil behind it so water drains away from the wall rather than toward it. Ideally, the finished grade should slope 1–2% away from the back of the wall.
Landscaping the Wall
Planting on top of and in front of the wall helps integrate it into the landscape and further stabilizes the soil. Good choices:
- Ground covers at the base and in front of the wall (creeping phlox, sedum, thyme)
- Low shrubs along the top (avoid large trees within 5 feet of any wall under 6 feet)
- Trailing plants in the face of drystack stone walls
Maintenance
Retaining walls require minimal ongoing maintenance:
- Inspect annually after heavy rain for any signs of movement, bulging, or tilting
- Check drainage outlets are clear and flowing
- Pull weeds from gaps in stone or block faces before roots can disturb the wall
- Reapply adhesive to any cap blocks that have shifted
Walls Over 4 Feet: What You Need to Know
A retaining wall over 4 feet tall (measured at the exposed face) is a structural element subject to significant engineering forces. The consequences of failure — which can involve thousands of pounds of moving earth — can be severe.
If your project requires a wall taller than 4 feet:
- Hire a licensed structural or geotechnical engineer to design the wall
- Pull the required building permit — inspections protect you
- Use a licensed contractor for installation, or follow the engineer’s drawings exactly if DIYing under permit
- Plan for significant geogrid reinforcement and possibly helical anchors or other tie-back systems
The additional cost of engineering ($300–$800) is minor relative to the wall’s total cost and is the difference between a wall that lasts a lifetime and one that fails catastrophically.
Final Thoughts
A well-built retaining wall is one of the most permanently useful landscape features you can add to your property. It turns unusable slope into productive garden space, stops erosion, and adds clean structure to your yard that looks good for decades.
The three most critical success factors:
- A level, compacted gravel base — this is where wall stability begins
- Proper drainage — perforated pipe and gravel backfill behind every wall
- Adequate batter — the wall must lean into the slope, not stand straight up
With quality segmental blocks from Versa-Lok or Allan Block, a rented plate compactor, and a methodical approach to each course, a DIYer with no masonry experience can build a professional-quality retaining wall that outlasts the house.

TurfTech HQ Editorial Team
Independent trade-focused editorial team