How to Dethatch a Lawn: Complete Guide
There’s a hidden problem lurking in many healthy-looking lawns — a dense mat of dead and living organic material sitting between the green grass blades and the soil beneath. It’s called thatch, and when it builds up too thick, it quietly sabotages everything you do to care for your lawn. Water can’t penetrate it. Fertilizer sits on top of it. Roots grow into it instead of into the soil. And pests and diseases find it to be an ideal home.
The solution is dethatching — physically removing that excess layer to restore the lawn’s ability to breathe, drink, and grow. But dethatching is also a stressful procedure for your lawn, and doing it at the wrong time or with the wrong method can set your grass back by weeks or even months.
This guide covers everything: what thatch is, how it forms, how to measure it, when to dethatch by grass type, which tools to use, the complete step-by-step process, how to help your lawn recover, and how to prevent excessive thatch from building up in the future.
What Is Thatch and Why Does It Build Up?
Thatch is a layer of tightly interwoven dead and living organic material — primarily stems, crowns, and roots — that accumulates between the grass blades and the soil surface. It’s brown and spongy in texture, somewhat like a thick layer of peat.
What thatch is NOT: Grass clippings. This is one of the most persistent myths in lawn care. Grass clippings break down rapidly because they’re composed mostly of water and leaf tissue. Thatch is made up primarily of tougher plant material: stolons, rhizomes, crowns, and roots that decompose more slowly.
What Causes Thatch to Build Up?
Thatch accumulates when dead organic material is produced faster than soil microbes can decompose it. Several factors contribute:
- Grass type: Grasses that spread aggressively via stolons (above-ground runners) or rhizomes (below-ground runners) naturally produce more thatch. Bermuda grass, Kentucky bluegrass, Zoysia, and creeping bentgrass are high-thatch producers. Bunch-type grasses like tall fescue and perennial ryegrass produce very little thatch.
- Overfertilization: Excessive nitrogen pushes rapid, lush top growth and produces more organic material than the soil can break down.
- Overwatering: Constantly moist conditions can reduce soil microbial activity and reduce decomposition rates.
- Pesticide overuse: Broad-spectrum pesticides can harm the earthworms and beneficial microbes that are the primary thatch decomposers.
- Compacted, acidic, or low-biology soil: Soil that lacks microbial activity and earthworm populations breaks down organic matter slowly.
- Infrequent aeration: Aeration introduces soil microbes to the thatch layer and speeds decomposition. Skipping aeration for years allows thatch to accumulate.
How Much Thatch Is Too Much?
A thin layer of thatch — up to half an inch — is actually beneficial. It acts as a natural mulch layer, moderating soil temperatures, retaining moisture, and cushioning foot traffic. Golf course superintendents actively manage thatch to specific depths for this reason.
The problem begins when the thatch layer exceeds half an inch to three-quarters of an inch. At that depth:
- Water and nutrients cannot easily penetrate to the soil.
- Grass roots begin growing into the thatch layer instead of the soil — leaving them exposed to drought, heat, and cold injury.
- The thatch layer retains moisture and creates a humid microenvironment ideal for fungal diseases.
- Insects, especially grubs and chinch bugs, shelter and overwinter in thick thatch.
- Grass may feel spongy, bouncy, or “floating” when walked on.
How to Measure Your Thatch Layer
- Use a garden trowel or utility knife to cut out a small wedge-shaped plug of turf, 2–3 inches deep.
- Look at the cross-section. Between the visible green grass blades and the soil, you’ll see the thatch layer — a distinct spongy, brown zone.
- Measure the thickness with a ruler. If it’s at or beyond 0.75 inches, it’s time to dethatch.
Another simple check: walk across the lawn. If it feels noticeably spongy or bouncy, that’s a sign of excessive thatch. A healthy lawn should feel firm underfoot.
When to Dethatch: Timing by Grass Type
Just like aeration, dethatching is stressful for grass. The timing needs to align with your grass’s active growth period so the lawn can recover quickly.
Cool-Season Grasses
Best time: Early fall (late August through September)
Fall is the optimal dethatching window for cool-season grasses — the same reasoning that makes fall ideal for aeration. Grass is entering its most vigorous growth period, temperatures are moderate, and fall rains help the lawn recover. Dethatching in fall also allows you to immediately overseed, taking advantage of the disturbed soil surface for excellent seed germination.
Second best: Early spring (March–April)
Spring dethatching is acceptable for cool-season lawns but risks more stress if done too early (when soil is still cold and frozen) or too aggressively (competing with the energy demands of spring green-up). If you go the spring route, wait until the lawn is actively growing and temperatures are consistently above 50°F.
Avoid: Mid-summer dethatching of cool-season grasses. Summer heat stress combined with the trauma of dethatching can cause serious, lasting damage.
Warm-Season Grasses
Best time: Late spring to early summer (May–June)
Dethatch warm-season grasses during their peak growth period when they can recover aggressively. Bermuda grass in particular benefits from spring dethatching — its rapid summer growth fills in disturbed areas quickly.
Avoid: Fall or winter dethatching of warm-season grasses. Grass entering dormancy cannot recover from the procedure and will remain damaged until the following spring growing season.
Universal Rules
- Never dethatch a drought-stressed lawn unless you have irrigation to support rapid recovery.
- Avoid dethatching within 30 days of herbicide application — disturbing the soil can interfere with pre-emergent barriers and damage recovering turf.
- Don’t dethatch a newly seeded lawn until it has gone through at least two full growing seasons.
Dethatching Tools: A Complete Comparison
There are several ways to dethatch a lawn, and the right tool depends on your lawn size, thatch severity, and budget.
Thatching Rake (Hand Rake)
A thatching rake has sharp, curved tines designed to cut and pull thatch from the soil surface. This is the most basic dethatching tool.
Best for: Small lawns (under 1,500 sq ft), light thatch buildup (0.5–0.75 inch), spot treatment of problem areas.
Pros: Inexpensive ($25–50), no power needed, precise control.
Cons: Physically demanding, slow for large areas, not effective for heavy thatch.
How to use: Rake vigorously in parallel rows, pulling thatch to the surface. You’ll pull up a surprising amount of material — especially on grass types prone to heavy thatch accumulation.
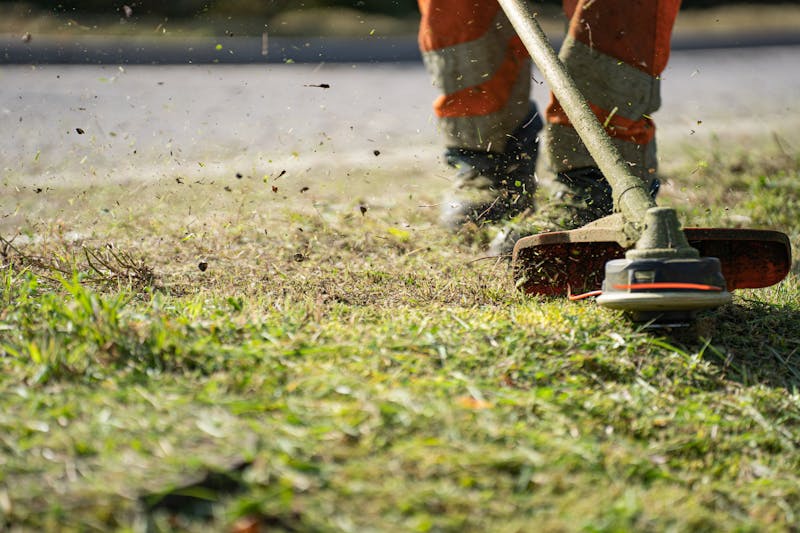
Power Rake (Motorized Dethatcher)
A power rake is a walk-behind machine with rotating flail blades or fixed tines that cut into the thatch layer and bring material to the surface. Available as gas-powered or electric models.
Best for: Medium to large lawns, moderate thatch buildup, annual maintenance dethatching.
Pros: Much faster than hand raking, highly effective for moderate thatch, available for rental (~$60–80/day at most equipment rental centers).
Cons: Can be aggressive — requires operator knowledge to set the correct tine depth. Overly aggressive settings can cause significant lawn damage.
How to use: Set the tine depth so the tines just contact the thatch layer without digging aggressively into the soil. Make parallel passes, then perpendicular passes for heavily thatched areas. Collect and remove the material brought to the surface.
Vertical Mower (Verticutter)
A vertical mower — also called a verticutter — uses vertically oriented spinning blades to slice through thatch and, at lower settings, into the soil. It’s the most aggressive dethatching tool and the one professionals use for severe thatch problems and lawn renovation.
Best for: Severe thatch (over 1 inch), lawn renovation projects, preparing ground for overseeding.
Pros: The most thorough thatch removal; also slices into soil to create ideal overseeding conditions.
Cons: Most aggressive — can leave the lawn looking temporarily terrible. Requires significant post-treatment care and recovery time. Available for rental at specialty equipment centers.
How to use: Set blade spacing to match your grass type (narrow spacing for Bermuda and bentgrass, wider for coarser grasses). Blade depth should cut through the thatch layer and barely nick the soil surface. Collect all removed material.
Dethatcher Attachment for Riding Mower
Several manufacturers offer dethatcher attachments for riding mowers and lawn tractors. These tow-behind units work similarly to power rakes and are excellent for large properties where a walk-behind machine would take too long.
Best for: Large properties (over 10,000 sq ft), mild to moderate thatch maintenance.
Pros: Efficient for large areas, uses equipment you already own.
Cons: Less aggressive than a walk-behind power rake; may not be effective for severe thatch.
Step-by-Step Dethatching Process
Follow this process for best results regardless of which tool you use.
Step 1: Mow the Lawn Short
Before dethatching, mow the lawn 1–1.5 inches shorter than your normal mowing height. This reduces the amount of living grass material you’ll pull up during dethatching and makes it easier to see and collect the thatch. Don’t scalp the lawn — just take it slightly lower than usual.
Step 2: Water Lightly (If Needed)
Soil that is moderately moist allows dethatching tines to penetrate more effectively than bone-dry soil. If you’ve had no rain and the soil is very dry, water lightly 1–2 days before dethatching. Avoid dethatching waterlogged or saturated soil.
Step 3: Mark Obstacles
Identify and flag any sprinkler heads, shallow utility lines, invisible fence wires, and other underground obstacles before running any power equipment. Vertical mower and power rake tines can damage irrigation heads instantly.
Step 4: Make Your First Pass
Work in parallel rows across the lawn. For moderate thatch, a single pass is often sufficient. For heavy thatch, make a second pass perpendicular to the first.
Adjust depth carefully:
- For light maintenance dethatching: tines should barely contact the thatch layer.
- For heavy thatch removal: tines should cut through the full thatch depth and just touch the soil surface.
- Avoid aggressive soil digging unless doing a full renovation.
Step 5: Remove All Material
The volume of material you bring to the surface will surprise you — especially on Bermuda or Kentucky bluegrass. Rake or blow all of it off the lawn surface promptly. Leaving it on the lawn creates the same problem you just solved.
Composted thatch material is excellent for garden beds. If it’s diseased, bag it for disposal.
Step 6: Fertilize
After dethatching, apply a starter or balanced fertilizer to support recovery. The disturbed surface is also an excellent opportunity for fertilizer to reach the root zone directly.
Step 7: Overseed (Cool-Season Lawns in Fall)
Fall dethatching followed by overseeding is a powerful combination. The vertical cuts and disturbed soil surface from dethatching create excellent seed-to-soil contact. Broadcast grass seed at the recommended rate immediately after dethatching.
Step 8: Water and Recover
Water thoroughly immediately after dethatching to push fertilizer into the soil and begin the recovery process. If you’ve overseeded, keep the top inch of soil consistently moist for 2–3 weeks to support germination.
Expect the lawn to look rough for 1–2 weeks after aggressive dethatching. New growth typically begins filling in within 10–14 days.
Lawn Recovery After Dethatching
Your lawn will look worse before it looks better — this is normal and expected. Here’s what to do during the recovery period:
- Reduce foot traffic for 2–3 weeks to allow new growth to establish.
- Water consistently — the disturbed root zone is more vulnerable to drying out.
- Mow at normal height once the lawn reaches mowing height — don’t delay mowing to “let it recover.” Normal mowing supports new growth.
- Avoid herbicides for 4–6 weeks if you’ve overseeded.
- Be patient with bare areas — they’ll fill in within 2–4 weeks on warm-season grasses and within 3–4 weeks on cool-season grasses following fall overseeding.
Preventing Excessive Thatch Buildup
The best approach to thatch is preventing it from reaching problematic levels in the first place. These practices keep thatch in check:
- Aerate annually or biennially: Core aeration introduces soil microbes to the thatch layer and dramatically speeds decomposition. This is the single most effective thatch prevention practice.
- Avoid overfertilization: Stay within recommended nitrogen rates and use slow-release formulas to avoid pushing excessive growth.
- Avoid overwatering: Consistently wet conditions slow microbial activity. Water deeply but infrequently.
- Mow at the proper height and frequency: Keeping growth in check with the one-third rule reduces the amount of organic material cycling through the lawn.
- Top-dress with compost: A thin layer of compost (1/4 inch) applied annually introduces decomposing microbes that help keep thatch in balance. This is especially effective combined with aeration.
- Minimize pesticide use: Preserve earthworm populations and soil biology — they’re your lawn’s natural thatch management team.
Recommended Dethatching Products
- Ames True Temper Thatching Rake: A well-built, durable hand rake for small lawns and spot dethatching. Heavy-gauge steel tines and a comfortable handle.
- Sun Joe AJ801E Electric Dethatcher: A popular and well-reviewed electric power rake for small to medium lawns. Easy to use, adjustable tine depth, and collects thatch with an included tray.
- Greenworks 27022 Corded Dethatcher: Another reliable electric option with a 14-inch path width and dual tine action. Good for lawns up to about 5,000 sq ft.
- Agri-Fab Tow Dethatcher: A tow-behind model for riding mower owners with large properties. Spring tines and adjustable downpressure weights.
Conclusion
Thatch is a silent performance killer for millions of lawns — and one of the most overlooked reasons that water, fertilizer, and overseeding fail to deliver results. The fix is straightforward: identify excess thatch early with a simple plug test, dethatch at the right time for your grass type, choose the appropriate tool for your lawn’s size and the severity of your thatch problem, and follow up with fertilizer, overseeding, and recovery care.
Combine regular dethatching with annual core aeration, and you’ll build the kind of soil environment where grass roots go deep, nutrients reach their target, and the lawn handles stress — heat, drought, disease, foot traffic — with ease. That’s the foundation every great lawn is built on.

TurfTech HQ Editorial Team
Independent trade-focused editorial team