How to Install a Sprinkler System: Step-by-Step Guide
A healthy lawn doesn’t happen by accident — it happens because someone figured out how to get the right amount of water to the right places at the right time. Installing your own sprinkler system is one of the most impactful DIY projects you can tackle, and it pays off every single season.
The national average cost to have a professional install an in-ground sprinkler system runs $2,500 to $4,500 for a typical residential lot. Do it yourself, and you’ll spend $500 to $1,500 in materials — saving thousands while gaining a system you fully understand and can maintain.
This guide walks you through the entire process: from the planning phase all the way to programming your controller and winterizing the system before the first frost.
Step 1: Plan Your System Before You Buy Anything
The biggest mistake DIYers make is skipping the planning phase. A well-planned system wastes nothing — water, time, or money.
Measure Your Yard and Draw a Layout
Start with a rough sketch of your property. Measure the dimensions of your lawn, planting beds, and any obstacles (trees, walkways, structures). Note where your water supply enters the house and where the outdoor faucet or main shutoff is located.
Mark areas by plant type:
- Cool-season turf (fescue, bluegrass)
- Warm-season turf (Bermuda, Zoysia, St. Augustine)
- Shrubs and ground cover
- Garden beds and perennials
Each plant type has different water needs, and that drives your zone layout.
Zoning Your Yard
Zones are groups of sprinkler heads controlled by a single valve. One zone runs at a time, so you can customize run times and frequency for each area. Typical residential systems have 4 to 8 zones.
Key zoning rules:
- Never mix rotary heads and fixed spray heads on the same zone — they have different precipitation rates
- Sunny and shaded areas should be on separate zones
- Slopes need their own zones to prevent runoff
- Turf and plant beds should be separated
Calculate Your Water Pressure and Flow Rate
This is the most technical part of planning, and it’s critical. Undersized pipes or too many heads per zone will result in poor coverage.
Measuring static water pressure:
- Attach a pressure gauge (available at any hardware store for under $15) to an outdoor faucet
- Turn the water on fully and read the gauge
- Most residential systems run 40–80 PSI — you want to work with the lower end for system design
Calculating flow rate (GPM):
- Time how long it takes to fill a 5-gallon bucket from the same outdoor faucet
- Divide 300 by the number of seconds it took
- That’s your approximate flow rate in gallons per minute
For example: If it takes 25 seconds to fill the bucket, your flow rate is 300 ÷ 25 = 12 GPM.
Subtract 25% as a safety margin — so in this example, plan your system around 9 GPM maximum per zone.
Step 2: Choose the Right Sprinkler Heads
Sprinkler head selection directly affects coverage quality and water efficiency. The wrong head in the wrong spot creates dry patches, overwatered areas, or wasted water on sidewalks.
Fixed Spray Heads
Fixed spray heads emit a fan-shaped spray pattern in a fixed arc (90°, 180°, 270°, or 360°). They’re ideal for:
-
Small turf areas
-
Planting beds
-
Narrow strips (less than 8 feet wide)
-
Radius: 4–15 feet
-
Flow rate: 0.5–3 GPM
-
Best for: Smaller, defined areas
Popular options include the Rain Bird 1800 Series and Hunter Pro-Spray — both widely available and compatible with most pop-up bodies.
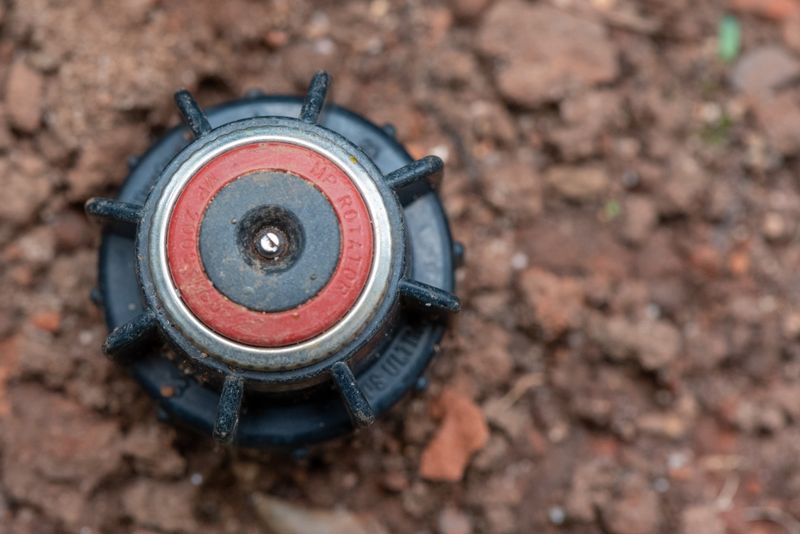
Rotary/Rotor Heads
Rotor heads use a rotating stream of water and cover much larger areas. They’re more efficient because they apply water more slowly, reducing runoff.
- Radius: 15–50 feet
- Flow rate: 0.5–4 GPM (per head)
- Best for: Large open turf areas
The Rain Bird 5000 Series and Hunter PGP Ultra are workhorses for residential lawns. MP Rotator nozzles (like the Hunter MP Rotator) are a popular hybrid — they fit on a standard spray body but rotate like a rotor, applying water at a very low precipitation rate.
Micro-Spray and Drip Emitters
For plant beds, slopes, and areas where targeted watering is needed, micro-spray heads and inline drip tubing are far more efficient than overhead spray. These are covered in detail in our drip irrigation guide.
Step 3: Select Your Pipe Type
PVC Pipe
Schedule 40 PVC is rigid, durable, and the standard choice for the main supply line from your water source to the valve manifold, and for lateral lines in stable soils.
- Pros: Long-lasting, handles high pressure, easy to repair
- Cons: Rigid (harder to route around obstacles), can crack if frozen
- Common sizes: ¾-inch main line, ½-inch laterals
You’ll need PVC primer and solvent cement for all connections. Always allow 15–30 minutes for glue to cure before pressurizing.
Polyethylene (Poly) Pipe
Poly pipe is flexible, making it easier to route around tree roots, curved beds, and other obstacles. It’s the preferred choice in colder climates because it’s less likely to crack from freeze-thaw cycles.
- Pros: Flexible, freeze-resistant, easy to work with
- Cons: Requires insert fittings and clamps, not quite as durable as PVC under sustained high pressure
- Common sizes: ¾-inch main, ½-inch laterals
Connections are made using barbed insert fittings secured with stainless steel clamps or crimp rings.
Recommendation: Use PVC for your main supply line where pressure is highest, and poly for your lateral runs to sprinkler heads.
Step 4: Trench Depth Requirements
Proper trenching depth protects your pipes from damage and, in cold climates, from freezing.
| Climate Zone | Recommended Depth |
|---|---|
| Warm climates (Zone 9–11) | 6–8 inches |
| Mild climates (Zone 7–8) | 8–10 inches |
| Cold climates (Zone 5–6) | 10–12 inches |
| Very cold climates (Zone 3–4) | 12–18 inches |
Use a trenching shovel or rent a walk-behind trencher for larger yards. A trencher makes quick work of long straight runs and typically costs $100–$200/day to rent. For rocky or root-heavy soil, a vibratory plow (also rentable) installs pipe with minimal digging by literally pushing the pipe underground.
Always call 811 (Dig Safe/Call Before You Dig) before you dig — it’s free, required by law in most states, and will locate any buried utilities on your property.
Step 5: Set Up the Valve Manifold
The valve manifold is the nerve center of your system. It houses all your zone valves in one location, typically near your water supply.
Components You’ll Need
- Backflow preventer (required by code in most jurisdictions)
- Pressure regulator (if your pressure exceeds 80 PSI)
- Master shutoff valve
- Zone valves (one per zone) — solenoid-operated valves like the Rain Bird DV Series or Hunter PGV Series
- Valve manifold assembly or individual valve boxes
Installing the Backflow Preventer
A backflow preventer stops irrigation water from siphoning back into your drinking water supply. Most municipalities require one by code.
- Atmospheric vacuum breaker (AVB): Cheapest option, must be installed 6 inches above the highest sprinkler head
- Pressure vacuum breaker (PVB): Better protection, must be 12 inches above highest head, most widely accepted
- Reduced pressure zone (RPZ) assembly: Most protection, required in some areas, must be installed by a licensed plumber in some states
Check your local codes before purchasing — your water utility can tell you exactly what’s required.
Wiring the Solenoid Valves
Each solenoid valve has two wires: one connects to a dedicated zone terminal on your controller, and the other connects to a common wire that runs back to the controller’s COM terminal.
Use UF-rated direct-burial wire (minimum 18 AWG for most residential systems). Bundle the common wire with the zone wires and run them in the trench alongside your pipe, or in a separate shallow trench.
Step 6: Install the Controller
The irrigation controller (timer) automates your entire system. It sends 24V AC signals to each solenoid valve on a schedule you program.
Choosing a Controller
- Basic timers: 4–8 zones, simple dial programming, $25–$80
- Smart controllers: Wi-Fi connected, weather-based scheduling, app control, $80–$250+
Smart controllers like the Rachio 3 or Orbit B-hyve can cut water usage by 20–40% by automatically skipping watering when rain is forecast or when soil moisture sensors indicate the lawn doesn’t need water. They’re worth every dollar.
Installation
- Mount the controller near an indoor outlet (garages work well)
- Run the 24V transformer wire to the wall outlet
- Connect the zone wires to the numbered terminals (Zone 1, Zone 2, etc.)
- Connect all common wires to the COM terminal
- If you have a master valve, connect it to the MV terminal
- Program your watering schedule: start time, days of the week, run time per zone
Programming Tips
- Water in the early morning (4–6 AM) to reduce evaporation and fungal disease risk
- Run each zone until 25–50% of the applied water has soaked in — typically 10–20 minutes for rotors, 5–10 minutes for spray heads
- Set up rain sensor or soil moisture sensor inputs if your controller supports them
Step 7: Step-by-Step Installation Walkthrough
Here’s the complete installation sequence once planning is done:
- Mark all heads with flags or spray paint before digging
- Call 811 and wait for utilities to be marked
- Tap into the main water supply — most DIYers connect at the outdoor faucet using a saddle tee or at the main supply line with a tee fitting
- Install the backflow preventer immediately after the supply tap
- Install the valve manifold in a valve box near the supply
- Trench the main line from the manifold to each zone’s starting point
- Trench lateral lines from each zone start to each sprinkler head location
- Install risers and sprinkler heads — use swing joint risers to protect heads from lawn mowers and settling
- Run and bury the control wire in the trench
- Backfill trenches carefully, tamping soil as you go
- Connect controller wiring, mount the controller
- Test each zone — check for leaks, adjust head arc and radius
- Fine-tune coverage — overlap should be 50–100% (head-to-head spacing)
Winterization Basics
If you live in a climate that freezes, you must winterize your system every fall before the first hard frost.
Blow-Out Method (Most Common)
- Shut off the water supply to the system
- Connect an air compressor (minimum 20 CFM for poly pipe, 25+ CFM for PVC) to the blow-out port near your backflow preventer
- Set the controller to run each zone manually
- Starting with the farthest zone, blow compressed air through each zone until only a fine mist comes out (about 30–60 seconds per zone)
- Never stand over a head while blowing out — use safety glasses
- Repeat each zone 2–3 times until no water remains
Never run compressed air through the backflow preventer — it can damage the internal components. Always blow downstream of it.
Manual Drain Method
Some systems have drain valves at low points. Open all drain valves, then open compressed air briefly to push remaining water to the drains. Close and cap the valves once drained.
Final Thoughts
Installing your own sprinkler system is a weekend project that delivers years of convenience, a greener lawn, and serious water savings compared to dragging hoses around. The key is in the planning — get your water pressure, flow rate, and zone layout right before you buy a single fitting.
Key takeaways:
- Plan zones based on plant type, sun/shade, and head compatibility
- Always install a backflow preventer
- Use swing joint risers to protect sprinkler heads
- Upgrade to a smart controller — the water savings pay for it quickly
- Winterize every fall in cold climates
With quality components — Rain Bird, Hunter, or Orbit heads and valves, and a smart controller like the Rachio 3 — your DIY system will outperform many professionally installed ones. Take your time on the planning, be methodical with the installation, and enjoy a lush lawn on autopilot.

TurfTech HQ Editorial Team
Independent trade-focused editorial team