How to Plant a Tree: Step-by-Step Guide for Long-Term Success
Planting a tree is one of the most lasting investments you can make in your property. A well-placed, properly planted tree will provide shade, beauty, wildlife habitat, and real estate value for decades — potentially for your entire lifetime and beyond.
But here’s the uncomfortable truth: most trees planted in home landscapes are planted incorrectly. Too deep, in the wrong location, with too much or too little water — and many never reach their potential. Some die within the first few years, costing homeowners hundreds of dollars and years of lost growth.
This complete guide to how to plant a tree walks you through every step, from choosing the right tree and location to long-term aftercare, so your tree gets the best possible start.
Step 1: Site Selection — Right Tree, Right Place
The single most important decision in tree planting happens before you ever pick up a shovel. Choosing the right tree for the right location determines whether you’ll be enjoying that tree for decades or dealing with problems for years.
Consider Mature Size
The young tree you’re holding in a 15-gallon container will grow — often dramatically. Research the tree’s mature height and canopy spread before planting. A tree that looks perfect at 6 feet tall may grow to 80 feet with a 60-foot spread. Planting it 10 feet from your house creates serious problems within 15-20 years.
As a general rule:
- Small trees (under 25 feet): Plant at least 10-15 feet from structures
- Medium trees (25-50 feet): At least 15-25 feet from structures
- Large trees (50+ feet): At least 25-40 feet from structures
Sun Requirements
Match the tree’s light requirements to the site. Most fruit trees, oaks, maples, and elms need full sun (6+ hours of direct sunlight). Dogwoods, redbuds, and serviceberries tolerate or prefer partial shade. Planting a sun-loving tree in shade will produce weak, disease-prone growth.
Soil Drainage
Trees are more sensitive to poor drainage than most homeowners realize. Stand at the site after a heavy rain. If water pools and takes more than 2-3 hours to drain, you have drainage problems. Most trees will suffer root rot in chronically wet soil. Options:
- Choose a species tolerant of wet conditions (bald cypress, river birch, swamp white oak)
- Install drainage before planting
- Build a raised bed
Proximity to Utilities
Always call 811 (or your country’s equivalent utility notification number) before digging. Underground gas, water, electrical, and telecom lines are more common than most people realize.
Also look up — overhead power lines are one of the most common causes of improper tree placement. Never plant a tree that will grow into overhead lines. Use small trees (under 20 feet) in those situations.
Distance from Pavement and Structures
Tree roots can lift sidewalks, crack foundations, and invade sewer lines. Keep large trees at least 10-15 feet from sidewalks and driveways, and ensure your chosen species isn’t known for aggressive surface roots (silver maple, certain willows, and some poplars are notorious offenders).
Step 2: Choosing Healthy Nursery Stock
The quality of the tree you buy makes a real difference in establishment success.
Balled-and-Burlapped (B&B)
The root ball is dug with soil intact and wrapped in burlap. Standard for larger trees. Advantages: Can be planted in most seasons; larger sizes available. Disadvantages: Heavy; some roots are always lost in digging; more expensive. Look for firm, intact root balls without cracks or excessive looseness.
Container-Grown
Grown in a pot. Advantages: Roots are fully intact; lighter weight; available year-round. Disadvantages: Roots can become pot-bound and girdled if left in container too long. Inspect the root ball when you buy — avoid trees with roots circling tightly inside the container or spiraling around the trunk. These girdling roots can strangle the tree over time if not corrected at planting.
Bare Root
Dormant trees sold with roots exposed (no soil). Typically available only in late winter/early spring. Advantages: Least expensive; easy to plant; no container-bound root issues. Disadvantages: Must be planted promptly before roots dry out; limited size selection; only available during a narrow window.
What to Look For in a Healthy Tree
- Straight trunk with no severe bends or mechanical damage
- Well-attached leader (main vertical stem) — no multiple leaders competing for dominance (for most shade trees)
- No visible girding roots at the base
- Root flare visible — you should see the trunk widening as it meets the soil/root ball. If the trunk goes straight into the ground like a telephone pole, it’s planted too deep at the nursery (a red flag)
- Healthy foliage (in season) — no yellowing, wilting, or pest damage
Step 3: Best Time to Plant
Fall (Best for Most Regions)
Fall is the optimal planting season for trees in most of the country. Cooler temperatures reduce transplant stress, and fall rains often reduce irrigation needs. Critically, the root system continues growing throughout fall even after the top goes dormant, allowing the tree to establish before next summer’s heat. Aim for 6-8 weeks before hard frost.
Spring (Excellent)
Spring is the second-best time. The entire growing season lies ahead for root establishment. Plant as soon as the soil can be worked and before summer heat arrives.
Summer (Proceed with Caution)
Summer planting is possible but requires more diligent irrigation. The combination of transplant stress and summer heat can overwhelm a newly planted tree. If planting in summer, water more frequently, mulch heavily, and consider a temporary shade cloth for the most heat-sensitive species.
Winter
In mild climates (USDA Zones 7 and warmer), winter planting of dormant trees is actually excellent — minimal stress, root growth continues in relatively warm soil, no irrigation burden. In cold climates, wait until spring.
Step 4: How to Plant a Tree — Step by Step
Tools You’ll Need
- Digging bar or spade (a digging bar is invaluable in compacted or rocky soil)
- Round-point shovel
- Tape measure
- Garden hose
- Mulch (wood chips or shredded bark)
- Stakes and tree straps (if needed)
1. Measure the Root Ball
Before digging, measure the height and diameter of the root ball or container.
2. Dig the Hole: Wide, Not Deep
This is where most people go wrong. The planting hole should be:
- Width: 2-3 times the diameter of the root ball. A wide, shallow hole allows roots to spread laterally into loosened soil.
- Depth: Equal to the height of the root ball — no deeper. The tree must be planted at the correct depth.
Never dig the hole deeper than the root ball and then backfill — loose soil settles, causing the tree to sink below grade over time.
3. Find and Protect the Root Flare
The root flare (also called the trunk flare or crown) is the area where the trunk flares outward as it meets the root system. The root flare must be at or slightly above finished grade. If you bury the root flare, the tree will decline and eventually die — it may just take 5-15 years.
For container trees: Remove the tree and examine where the trunk begins to flare. Remove any excess soil from the top of the root ball if necessary to find the true root flare.
For B&B trees: Probe the top of the root ball to find the flare — it’s often buried several inches deep by nursery practices. Remove that excess soil before planting.
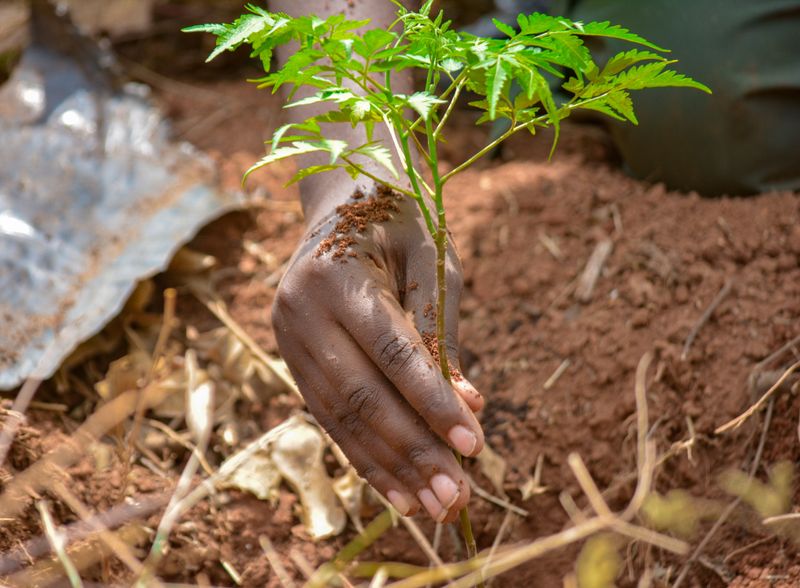
4. Set the Tree in the Hole
Place the tree in the center of the hole. Step back and check that the tree is plumb (vertical) from two directions. Also identify the tree’s best-looking side and orient it toward the main viewing angle.
5. Remove Containers, Burlap, and Wire
- Containers: Remove completely. Score and tease out any circling or girdling roots.
- Burlap and wire basket (B&B): Do not remove the wire basket before setting in the hole (it holds the root ball together). Once the tree is positioned, cut and fold back the top third of the wire basket. Remove as much of the burlap as possible — pull it out from underneath or cut it away. Synthetic burlap (doesn’t rot) must be completely removed. Natural burlap can remain on the sides and bottom if it’s difficult to remove.
6. Backfill with Native Soil
Do not amend the backfill soil. This is counterintuitive — adding compost or fertilizer to the backfill sounds like it would help, but research consistently shows that amendments create a “pot effect” that discourages roots from growing beyond the planting hole into the native soil. Use the soil you dug out.
Backfill in lifts, gently firming each layer to eliminate air pockets (do not stomp — this compacts soil and damages roots). Keep backfilling until you reach grade.
7. Create a Watering Basin
Use extra soil to build a shallow berm (ring) around the outer edge of the planting hole. This creates a watering basin that channels irrigation water directly to the root ball rather than running off. The berm should be about 3-4 inches tall.
8. Water Thoroughly
Fill the watering basin completely and let it drain. Refill and let drain again. This initial deep watering settles the soil and eliminates air pockets around the roots.
Use a root stimulator product (containing IBA — indole-3-butyric acid) at initial planting to encourage faster root establishment, especially for summer plantings.
9. Apply Mulch
Apply a 3-4 inch layer of wood chips or shredded bark over the entire planting zone, extending 3-6 feet from the trunk (farther is better). Keep mulch 3-6 inches away from the trunk flare — never pile it against the bark. This single step dramatically improves establishment success.
Step 5: Staking — Only When Necessary
Most trees do not need staking. Staking is necessary only when:
- The tree cannot stand upright on its own due to a top-heavy canopy or root ball imbalance
- The planting site has extreme wind exposure
- You’re planting in a high-traffic area where the tree could be knocked over
How to stake correctly:
- Use two stakes placed on opposite sides of the tree, outside the root ball
- Attach to the tree low on the trunk (at the lowest point where it stands upright when you hold it there) using wide, flexible tree straps — never wire or rope directly against bark
- Allow slight trunk movement — the tree needs to flex to develop trunk taper and strength
- Remove stakes after one growing season — never leave them for more than 1-2 years
Step 6: Aftercare — The First Two Years
The period from planting through the first two full growing seasons is called the establishment period. During this time, your tree is rebuilding the root system it lost during transplanting. Success or failure largely depends on consistent irrigation.
Watering Schedule
- Year 1: Water deeply 2-3 times per week during the growing season, less in cool or rainy weather. Each watering should deliver 1-1.5 gallons per inch of trunk diameter (measured at knee height). A slow-release drip bag like the Treegator is ideal for consistent deep watering.
- Year 2: Water deeply once a week during dry periods. The tree is becoming established but still needs support during heat and drought.
- Year 3+: Most established trees need supplemental watering only during extended droughts.
The number one killer of newly planted trees is improper watering — both too little and too much. Check soil moisture 4-6 inches below the surface before watering. It should be moist like a wrung-out sponge, not dry or soggy.
Recognizing and Addressing Transplant Shock
Signs of transplant shock include:
- Leaf scorch (brown leaf edges and tips)
- Wilting during hot weather despite moist soil
- Premature leaf drop
- Smaller than normal leaves
- Slow or no new growth
This is normal and expected in the first 1-2 seasons. Most trees recover if watered correctly. Do not fertilize a stressed tree — it adds salt stress and encourages top growth the root system can’t support. Be patient; some trees take 2-3 years to begin vigorous growth after transplanting.
Quick-Reference Planting Checklist
- Called 811 — no underground utilities in planting zone
- Tree’s mature size appropriate for site
- Soil drainage adequate for chosen species
- Root flare identified and at/above grade
- Hole dug 2-3x wider than root ball, no deeper
- Container/burlap/wire removed or pulled back
- Backfilled with native soil (no amendments)
- Watering basin created
- Initial deep watering completed
- 3-4 inch mulch ring applied, clear of trunk
- Stakes installed only if necessary, with flexible straps
Conclusion
How to plant a tree correctly comes down to a few non-negotiable principles: choose the right species for the site, dig wide not deep, keep the root flare above grade, backfill with native soil, and water consistently through establishment. These steps are straightforward, but skipping any one of them — especially planting depth — significantly reduces the tree’s chances of thriving.
Invest in the right tools — a quality digging bar for compacted soil, wide-strap tree straps for staking, root stimulator for establishment, and wood chip mulch for moisture retention — and give your tree the best possible start. The tree you plant today will still be standing, growing, and giving back long after you’re gone.

TurfTech HQ Editorial Team
Independent trade-focused editorial team