Lawn Aeration: The Complete Guide to Aerating Your Lawn
If your lawn looks thin, feels rock-hard underfoot, drains poorly after rain, or just seems to resist every attempt at improvement — compaction is likely your biggest problem. And the most effective solution is one that most homeowners overlook entirely: lawn aeration.
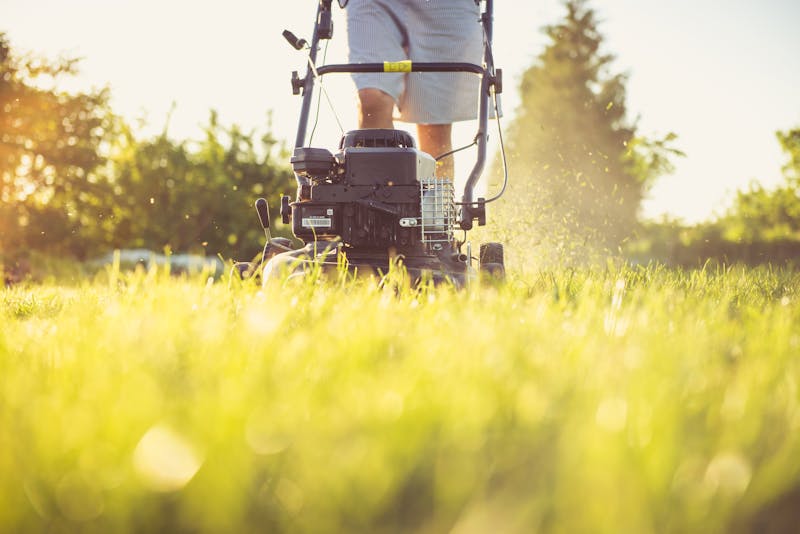
Aeration is the process of creating small holes or channels through your lawn to break up compacted soil, improve air and water movement to the root zone, and allow grass roots to expand deeper and stronger. Done at the right time and with the right method, it’s one of the highest-return lawn care practices you can do — and often the first step that makes everything else (fertilizing, overseeding, watering) actually work.
This guide covers everything you need to know: the difference between core and spike aeration, when to aerate for your grass type, how to recognize the signs of compaction, DIY vs. professional options, step-by-step instructions, and post-aeration care.
What Is Lawn Aeration and Why Does It Matter?
Soil compaction happens when soil particles are pressed together, reducing the pore space between them. In a healthy lawn, those pores are filled with air and water — essential for root growth and microbial activity. Compacted soil restricts all of it.
The result: grass roots stay shallow, water runs off instead of soaking in, fertilizer doesn’t reach the root zone, and the lawn becomes thin and susceptible to heat, drought, and disease.
Common causes of soil compaction:
- Regular foot traffic (especially from children, dogs, and entertaining)
- Heavy lawn equipment (riding mowers, especially on clay soils)
- Clay-dominant soil, which compacts much more easily than sandy or loam soil
- Heavy rainfall without adequate drainage
- Sod installation over poor subsoil
Aeration physically breaks up compaction and restores the soil’s ability to breathe, absorb water, and support deep root growth.
Core Aeration vs. Spike Aeration
There are two fundamentally different approaches to aerating a lawn, and they produce very different results.
Core Aeration (Plug Aeration)
Core aeration — also called plug aeration — uses hollow tines to physically remove small cylindrical plugs of soil from the ground, typically 0.5 to 0.75 inches in diameter and 2 to 4 inches deep. These plugs are deposited on the lawn surface, where they break down over 2–4 weeks.
Why core aeration is superior:
- Removes soil from the ground rather than just displacing it — actually reduces compaction rather than pushing it sideways.
- Creates genuine open channels for air, water, and nutrients to reach roots.
- Speeds thatch decomposition by introducing soil microbes to the thatch layer.
- Creates ideal seed-to-soil contact points for overseeding.
- Results last significantly longer than spike aeration.
Core aeration is the method recommended by virtually all turf science experts and is what professional lawn care companies use.
Spike Aeration
Spike aeration uses solid tines or spikes to puncture holes in the ground without removing any soil. Spike shoes — straps that attach to your feet with metal spikes — are the most common DIY spike aeration tool.
The problem with spike aeration:
- The tines push soil sideways and downward, which can actually increase compaction in the area immediately around each hole.
- Holes close quickly, especially in clay soil.
- No long-term benefit comparable to core aeration.
- Spike shoes in particular are largely ineffective — the weight of a single person walking is not enough force to penetrate compacted soil meaningfully.
When spike aeration is acceptable: Very light soils (sandy or loam) that aren’t severely compacted may see some benefit from spike aeration as a quick, low-cost pass between core aeration cycles. For clay-heavy or moderately to severely compacted soils, skip spike aeration entirely and go straight to core aeration.
Signs Your Lawn Needs Aeration
Not every lawn needs annual aeration. Here’s how to tell if yours is a good candidate:
- The screwdriver test: After a rain or watering, push a screwdriver or 6-inch nail into the soil. If you need significant force or can’t push it 4 inches deep, your soil is compacted.
- Water pools or runs off after rain: In a healthy lawn, water soaks in quickly. Puddling or runoff suggests compaction is blocking infiltration.
- The lawn feels hard or spongy in the wrong way: Hard and unyielding underfoot indicates compaction. Spongy from thick thatch is a different problem (see our dethatching guide).
- Heavy clay soil with regular foot or equipment traffic: Clay soil compacts easily and benefits from aeration every 1–2 years even without dramatic symptoms.
- Thin, patchy grass that doesn’t respond to fertilizing or overseeding: Fertilizer and seed both need to reach the root zone to be effective. Compaction blocks both.
- Established lawn on a former construction site: Builder soils are almost always severely compacted from heavy equipment use during construction.
The plug test: Remove a 6-inch-deep core of soil from the lawn. Healthy soil should show grass roots penetrating at least 2 inches deep, ideally 4–6 inches. Roots shorter than 2 inches indicate compaction restricting root growth.
Best Time to Aerate by Grass Type
Timing aeration to align with your grass’s active growth period is critical. Aeration creates stress — pulling plugs from the soil is disruptive — so you want the grass to be in a state of vigorous growth so it can recover quickly and take advantage of the improved conditions.
Cool-Season Grasses
Best time: Early fall (late August through October)
Fall is by far the best time to aerate cool-season lawns. Here’s why:
- Grass is entering its most active growth period of the year after summer dormancy.
- Soil temperatures are still warm enough for rapid root growth.
- Fall aeration can be immediately followed by overseeding, giving new seed the ideal environment (good soil contact, warm soil, fall rains) to establish before winter.
- Cooler air temperatures reduce stress on the lawn during recovery.
- Weed pressure is lower in fall, meaning new seed faces less competition.
Second best: Early spring (March–April)
Spring aeration is acceptable for cool-season lawns but has drawbacks: you may interfere with pre-emergent herbicide timing, and the stress of aeration during spring green-up competes with the lawn’s push to establish itself after winter.
Warm-Season Grasses
Best time: Late spring to early summer (May–June)
Warm-season grasses should be aerated when they are in active growth and peak performance — typically once the lawn is fully green and temperatures are consistently warm. Late spring through early summer is ideal.
- Bermuda grass recovers rapidly from aeration during its aggressive summer growth phase.
- Zoysia and St. Augustine benefit from late spring aeration before peak summer heat.
- Avoid aerating warm-season grasses in fall — they’re entering dormancy and won’t recover effectively.
Avoid aerating warm-season grasses: During dormancy (winter), during drought stress without irrigation, or during the heat of peak summer unless irrigation is reliable.
DIY Aeration vs. Professional Aeration
You have two main options for aerating your lawn: rent or buy equipment and do it yourself, or hire a professional. Both have merit depending on your lawn size, budget, and physical ability.
DIY Aeration
Equipment options:
- Manual core aerator: A push-handle tool with hollow tines. Works well for small lawns (under 2,000 sq ft). Low cost (~$30–80) but labor-intensive. Manual core aerators are a good investment for small yards.
- Tow-behind aerator: Attaches to a riding mower. Ideal for large lawns. The weight box can be filled with sand or water for better penetration. Tow-behind core aerators cost $150–300 and work well on larger properties.
- Gas-powered walk-behind aerator (rental): The most effective DIY option for medium to large lawns. Available at most equipment rental centers (Home Depot, Sunbelt, United Rentals) for $70–100 per day. Heavy and aggressive — produces excellent results.
DIY pros:
- Cost savings — rental plus your time vs. professional fee.
- Flexibility to do it exactly when conditions are right.
- You control the pass coverage.
DIY cons:
- Gas-powered aerators are heavy (often 300+ lbs) and physically demanding to operate, especially on slopes.
- Requires knowing where underground utilities, irrigation heads, and invisible fence wires are located.
- Rental availability can be limited during peak season (early fall books up fast).
Professional Aeration
Most lawn care companies offer aeration as a standalone service or as part of a fall lawn program.
Typical cost: $75–250 for a residential lawn, depending on size, region, and whether overseeding and fertilizing are bundled.
Professional pros:
- Commercial-grade equipment produces deeper, more effective aeration.
- Technicians are experienced with spacing, coverage, and avoiding underground hazards.
- Often bundled with overseeding and fertilizing for comprehensive fall treatment.
- Saves significant physical effort.
Professional cons:
- Higher upfront cost vs. DIY.
- Less scheduling flexibility — popular fall windows book up weeks in advance.
- Variable quality between companies — look for reviews and ask specifically about equipment used.
For most homeowners with lawns over 4,000 sq ft, professional aeration plus overseeding is often the better value when you factor in rental fees, equipment damage risk, and physical labor.
How to Aerate Your Lawn: Step-by-Step
If you’re going the DIY route, here’s the complete process.
Step 1: Mark Obstacles
Before running any aerator, mark all sprinkler heads, invisible fence wires, shallow utility lines, and other underground obstacles with small flags or spray paint. A single pass over an unmarked sprinkler head can destroy it completely.
Call 811 (Dig Safe) if you have any uncertainty about underground utility lines.
Step 2: Mow and Water the Lawn
Mow the lawn to its normal height 2–3 days before aerating. Then water the lawn thoroughly the day before aeration — moist soil allows tines to penetrate much deeper than dry, hard soil. Don’t saturate it to the point of being muddy, but the top 4–6 inches should be moist.
Step 3: Make Your First Pass
Run the aerator in parallel passes across the lawn, overlapping slightly to ensure complete coverage. Most aerators pull plugs every 4–6 inches — for severely compacted soils, make a second pass at a 90-degree angle to the first.
Two perpendicular passes will leave approximately 40–60 plugs per square foot, which is the target for compacted or clay-heavy soils.
Step 4: Leave the Plugs on the Lawn
Resist the urge to rake up the plugs. Leave them on the surface. They’ll break down within 2–4 weeks, returning organic matter and microbes to the soil. Running a lawn roller or mower over them can speed up breakdown if you want a cleaner look faster.
Step 5: Apply Fertilizer Immediately After
Aerating creates the ideal opportunity to fertilize — the open channels allow fertilizer direct access to the root zone. Apply your chosen fall fertilizer immediately following aeration.
Step 6: Overseed (For Cool-Season Lawns)
If you’re overseeding (highly recommended in fall for cool-season lawns), broadcast grass seed immediately following aeration. The aeration holes provide excellent seed-to-soil contact — far better than seeding on unprepared ground. Top-dress with a thin layer of compost or topsoil for even better germination rates.
Keep the soil moist for 2–3 weeks following overseeding to support germination.
Post-Aeration Care
The 4–6 weeks following aeration are when your lawn does the most work. Support recovery with these practices:
- Water deeply after aeration to push nutrients from fertilizer into the open channels.
- Keep foot traffic light for 3–4 weeks to allow new roots to establish.
- Mow as normal — mowing doesn’t interfere with aeration recovery.
- Don’t apply pre-emergent herbicides for 8–12 weeks after overseeding — they’ll prevent germination of your new grass seed.
- Be patient with bare spots — if you’ve overseeded, germination takes 7–21 days depending on grass type and conditions.
How Often Should You Aerate?
Aeration frequency depends on soil type and lawn use:
- Clay-heavy soil with regular traffic: Aerate every year, in fall for cool-season grass or late spring for warm-season grass.
- Loam soil with moderate use: Every 1–2 years.
- Sandy soil with light use: Every 2–3 years as a maintenance practice.
- New construction lots: Aerate heavily in the first 2–3 years to break up builder compaction.
- High-traffic areas (paths, play areas, sports fields): Consider twice per year — once in spring, once in fall for cool-season lawns.
Recommended Aeration Products
- Agri-Fab 45-0299 Tow Plug Aerator: A reliable tow-behind option for riding mower owners with medium to large lawns. Weighted tray for improved penetration.
- Yard Butler Lawn Coring Aerator: A well-rated manual core aerator for small lawns and spot treatment. Durable construction and hollow tines that produce real plugs.
- Punchau Lawn Aerator Shoes: If you want spike aeration for a light sandy soil between core aeration cycles, these are among the better-built options. Not a substitute for core aeration.
Conclusion
Lawn aeration is one of those practices that delivers results completely out of proportion to the effort involved. A single fall aeration session can transform a thin, struggling lawn into one that absorbs water and fertilizer properly, develops deep roots, and fills in bare spots with new growth.
The most important things to remember: use core aeration, not spike aeration; time it to your grass type’s active growth period; follow immediately with fertilizer and overseed for cool-season lawns; and make it a regular part of your annual or biannual lawn care routine. Your lawn will respond to every other input — water, fertilizer, seed — dramatically better once compaction is no longer standing in the way.

TurfTech HQ Editorial Team
Independent trade-focused editorial team