Lawn mower leaving strips of uncut grass? 8 fixes
Quick answer
A lawn mower usually leaves a strip of uncut grass because the passes do not overlap, one blade is dull, damaged, incorrectly installed, or the wrong length, the deck drive is slipping, or packed clippings are disrupting airflow. Correct tire pressure and test mowing technique before adjusting deck level or pitch.
Common questions
- Why does my lawn mower leave a strip of grass in the middle?
- A center strip on a multi-blade deck usually points to one blade path not reaching or lifting the grass. Check for a wrong-length, bent, dull, or incorrectly installed blade; buildup around one spindle; and a belt, idler, or spindle problem that reduces blade speed.
- Why does my mower leave a line of uncut grass at one edge?
- An edge line commonly comes from too little overlap between passes, turning away from the previous cut, or a wheel dropping into a rut. If the line stays on the same side of the mower, also check tire pressure, blade condition, and side-to-side deck level.
- When should a dealer inspect an uneven mower cut?
- Stop and use a qualified mower technician for severe vibration, spindle play, blade-to-deck contact, a bent deck or crankshaft, repeated belt loss, damaged safety equipment, or any live diagnostic that would require removing a guard or bypassing an interlock.
Source note: Reviewed against current Toro operator guidance, Husqvarna cut-quality troubleshooting, a Husqvarna operator manual, and U.S. Consumer Product Safety Commission mower-safety guidance. Use the manual for the mower's exact model for isolation, blade, belt, deck, and torque procedures.
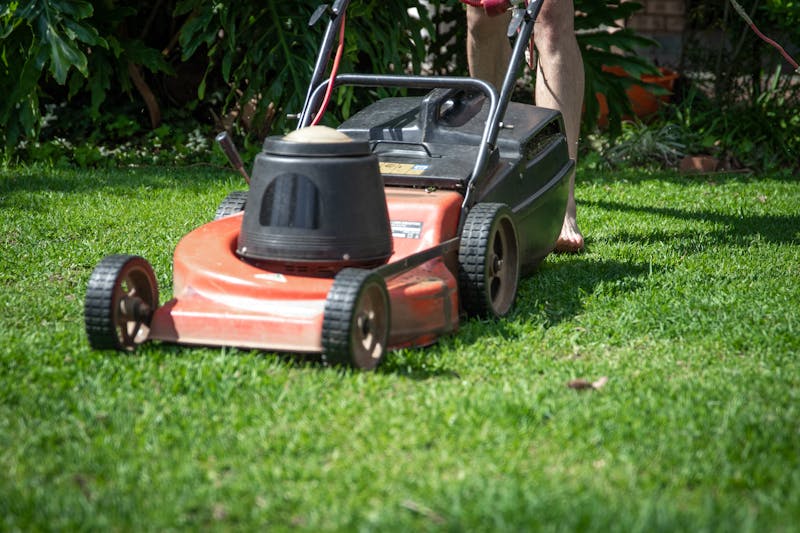
If your lawn mower is leaving strips of uncut grass, the shape and location of the strip can tell you where to look. A clean line down the middle of a multi-blade deck points to a different problem than a line at the edge of every pass.
Start with technique, grass conditions, and tire pressure. Then inspect buildup and blades. Adjust the deck only after ruling out those simpler causes, because leveling around a low tire or bent blade creates a second problem.
Quick diagnosis by cut pattern
Stop after two or three passes and look back from both directions. Record whether the defect stays with the mower, appears between passes, follows a wheel track, or changes on slopes.
| Cut pattern | Most likely checks |
|---|---|
| Strip between blades | Blade length, blade condition and orientation, buildup, spindle drive, belt slip |
| Strip at one edge | Pass overlap, turns, tire tracks, side blade, deck level |
| Random missed stalks | Dull blades, excessive ground speed, low blade speed, wet or lodged grass |
| Stepped cut or ridge | Tire pressure, side-to-side deck level, lift linkage, uneven ground |
| Scalped patches | Cutting height, deck pitch, terrain, anti-scalp hardware, bent parts |
| Poor cut only in wet or tall turf | Ground speed, cut height, deck airflow, buildup, engine or battery load |
A defect that appeared after an impact needs cautious inspection. Stop using the mower for strong vibration, rotating-part contact, or a new mechanical noise.
Make the mower safe before deck work
Park on a level, firm surface away from bystanders. Disengage the blades or PTO, set the parking brake, stop the engine, remove the key, and wait for the blades and every other moving part to stop.
Next, follow the exact model manual to prevent an accidental start. Depending on the mower, that may mean moving spark-plug leads away from the plugs, disconnecting battery power, removing a battery pack, or applying another PTO or electrical isolation step. Never bypass an interlock, defeat an operator-presence control, or run the deck with a guard removed to watch a belt.
Never reach under a deck held only by a lift or jack. Use the approved service position and rated supports. Keep hands out of the discharge chute and follow the manual’s clearing method.
What each uncut-strip pattern means
1. A strip between two blades
If a narrow strip remains in the same place under a multi-blade deck, one blade path may not be cutting or lifting grass correctly. Compare every blade with the parts information for the exact deck.
Look for a blade that is:
- Shorter than the matched set or wrong for that spindle position
- Bent, cracked, deeply nicked, or worn at the sail
- Installed in the wrong orientation
- Loose or mounted against damaged hardware
- Surrounded by packed clippings that block airflow
Some decks use different blades by position or rotation, so do not rely on a generic rule about which side faces up. Match part numbers and orientation to the manual. Use its blade-blocking method and fastener torque; replace, rather than straighten or weld, a damaged blade.
If all blades are correct, a slipping belt, weak tensioner, seized idler, or worn spindle can slow one blade under load. Operators can inspect accessible parts while isolated; spindle replacement and energized tests belong with a qualified technician.
2. A strip at the outer edge of a pass
An edge strip is often an overlap problem. Recut a dry test area with the mower’s wheel path overlapping the previous pass by a consistent amount. Slow before turns so the deck does not swing away from the uncut edge.
If the strip disappears, correct the route rather than adjusting the deck. Our professional lawn-mowing guide covers overlap, mowing direction, and height strategy.
If the strip stays on the same side, check that tire, blade, spindle area, and deck measurement. A wheel dropping into a rut can also tilt the deck.
3. Random missed stalks or wispy tufts
Random survivors usually mean the mower is not standing the grass up and cutting it cleanly. Common causes are dull blades, fast travel, low blade speed under load, and wet, matted, or flexible grass.
Use the operating engine speed or battery performance setting stated in the manual, then reduce ground speed. Inspect the cutting edges: frayed, pale grass tips support a dull-blade diagnosis. If the engine cannot maintain speed or an electric mower repeatedly limits power in moderate, dry turf, service the power problem instead of making repeated low-quality passes.
4. A stepped cut or ridge from one side to the other
Set all tires cold to the model specification before taking deck measurements. Unequal pressure changes chassis height and can make a correct deck look out of level.
On a level surface, position the blades and measure only as the manual directs. Check side-to-side level first when specified, then front-to-rear pitch. There is no universal pitch number: deck design, blade position, and measurement points vary.
If an adjustment will not hold or reaches the end of its range, stop turning the lift link. Worn pivots, bushings, hangers, chains, spindle housings, or a distorted deck shell may need service.
5. Scalping on crowns, dips, or turns
Scalping can occur when the cut height is too low for the terrain, the deck pitch is wrong, an anti-scalp roller is missing or misadjusted, or the deck drops as the mower crosses a hollow. Raise the cut height and test the same route before changing hardware.
If one blade scalps on flat ground, compare blade-tip height through a full rotation. A bent blade, spindle, deck mount, or crankshaft is a repair issue, not a leveling shortcut.
6. A poor cut only in wet or tall grass
Wet clippings mat the turf and pack the deck. Tall, dense growth also consumes more blade power and may exceed the airflow available at normal travel speed.
Wait for the lawn to dry when possible. Raise the deck for a first pass, reduce speed, use a narrower effective pass in heavy growth, and return to the desired height later. Clean packed material by the model-approved method after shutdown and isolation.
The corrective sequence that avoids wasted adjustments
Work through one change at a time so the test cut shows what fixed the problem:
- Test technique: Use dry, upright turf, consistent overlap, the specified mowing speed, and a slower ground speed.
- Normalize the chassis: Correct tire pressure and confirm the wheels and height settings match.
- Restore airflow: Safely remove deck buildup and inspect baffles, discharge parts, and vent areas.
- Verify the blade set: Match part numbers, length, condition, orientation, balance, and installation to the manual.
- Inspect the deck drive: Check accessible belt, idler, tensioner, pulley, and spindle conditions while isolated.
- Measure level and pitch: Use a flat surface and the model’s blade positions, measurement points, and adjustment order.
- Make a controlled test cut: Repeat the original route with the same height and direction, then compare the pattern.
- Escalate unresolved faults: Stop if the machine vibrates, contacts rotating parts, loses belts, or needs guarded live testing.
Operator checks versus dealer work
| Usually suitable for an informed operator | Refer to a dealer or qualified technician |
|---|---|
| Correct overlap and ground speed | Diagnose blade-speed loss with the deck energized |
| Set tire pressure to the manual | Replace a spindle, bent crankshaft, or damaged deck shell |
| Clean a properly secured, isolated deck | Repair safety interlocks or operator-presence controls |
| Inspect and replace blades when the manual permits | Correct severe vibration or blade-to-deck contact |
| Measure and adjust deck level by the manual | Repair lift geometry that will not adjust or stay set |
Commercial crews should record the symptom, test conditions, measurements, parts, and final cut result. The commercial mower maintenance checklist turns that finding into a repeatable inspection routine. If the mower’s ground drive—not the deck—fades as the unit warms, follow the separate hot hydrostatic mower diagnosis.
Next step: verify the cut before closing the job
Reinstall every guard, remove tools and supports, and test safety systems as the manual directs. Mow the controlled strip again using the same height, direction, and overlap that reproduced the fault.
The job is complete only when the original uncut line is gone and the mower runs without abnormal vibration, noise, heat, or belt behavior. If the strip remains, stop changing several variables at once and take the documented pattern to the manufacturer or servicing dealer.
Sources

TurfTech HQ Editorial Team
Independent trade-focused editorial team